Showing posts with label hair. Show all posts

Sunday, September 02, 2012

Double Back Pony Tutorial

Yes, another hair tutorial...they are just so much fun!  This style is very feminine and can look a little vintage or retro if you tweak it a bit.  I wore the second variation shown in the video--more of a double back bun--to the pool all summer and it was great in and out of the water.  For me, a size large flexi clip works great, so try it with whatever size you usually use for a full twist...usually a size or two larger than what you need for a ponytail.

Let me know if you have questions, and enjoy making the world a prettier place with your Lilla Rose hair jewelry!


Friday, August 31, 2012

New French Twist Tutorial

After a visit to my favorite hair stylist, my locks are now shoulder-length and I have a nice shock of bangs.  This has changed-up my styling routine and I finally have mastered the French twist again.    I'm still using a size large flexi clip to secure it...the size you need will depend on the thickness and length of your hair.  Thanks for watching!


Make the world a prettier place by wearing your flexi clips from Lilla Rose!

Tuesday, July 24, 2012

Easy Hairstick Bun Tutorial

Get that hair up girls--it's too hot outside for long locks down our backs!  Here's an easy hairstick bun tutorial for ya.  It will hold with just a single pencil or chopstick if that's all you have.  Of course, it will look even more beautimus if you try it with a set of Lilla Rose beaded hairsticks, so go to my website to get some :) .


Wednesday, July 18, 2012

Asian Bun with Hairsticks Tutorial

Another fun bun, hun!  Enjoy!

Asian Bun with Hairsticks (shown w/Lilla Rose Freestyle sticks)


--By the way, no making fun of my Agent P t-shirt ;) ! 

There are all kinds of pretty hairsticks available on my Lilla Rose website.  Made of birch wood, they are available in black and blonde pairs and start at $12 a set.
   
Antiqued Copper w/Etched Petals; Silver Summer Sunflower; Soft Pink & Rose
Have a beautiful day and stop by my facebook page to become a flexi fan!

Sunday, July 08, 2012

Braided Bun Trio

I sat at the girls' table today while out to lunch with a bunch of friends from church.  Our conversation starter?  Why, HAIR, of course!  My friend Kristin remarked that she should have known my style for the day was video-worthy *smile*.   And, wha-la, it was...made this in the early-morning hours before my kiddos were up and romping around.  After yesterday's record-breaking high temperatures (107 at my house), I had to get my locks up and off my neck!  Hope you enjoy it!

Braided Bun Trio w/bobby pin accents


Have a beautiful day!

Monday, July 02, 2012

One Flexi, Six Styles & Six Flexis, Six Styles

Can you say that title 5 times fast? 

Two new videos for you flexi fans this week.  Plus--the new July flexi-of-the-month just came out...a Summer Fun Flip Flop that is way beyond cute!


The first video demos the "flexibility" of one size of flexi--I use a medium to do six different styles.


The second shows six of our seven available sizes and a different style for each.

Six Flexis, Six Styles


Make the world a prettier place and wear your Lilla Rose flexi!

www.lillarose.biz/ResaRuth
www.facebook.com/LillaRose.ResaRuth

Thursday, June 07, 2012

Flexi Help: How to make your ponytail stay tight!

Tip #2:  Wrap it with a ponytail elastic!
Got a flexi floating around your drawer of hair things because it won't stay put? Try these tricks to help your ponytail stay tight.


Friday, May 25, 2012

'Do of the Day #7: Easy Braided Bun with a Flexi Clip

Ever have a day when you just don't want to fix your hair to wear it down? Ha! We all have them! Try this easy basic braid folded into a chic low bun to make those days a breeze.


And I'm having a special on my website until the end of this month:

Buy 3 items (Flexi clips, Headbands or You-Pins) and receive 1 FREE (up to $16, please). Purchases must be made online by 10 p.m. CST on May 31, 2012. You must email me at flexisrock@gmail.com with your order number and free selection. Free item will be processed after the promotional period ends and sent separately from your initial order. This promotion is only good through Resa Eastwood, Independent Consultant and is not sponsored by Lilla Rose, Inc.

Thursday, May 24, 2012

'Do of the Day #6: Braid with Side Bun

A side bun instantly adds a little elegance to your style...especially if it's a bun that won't fall out every half hour.  (Yeah, you other gals with long thick hair know what I'm talking about!)  Try this look with or without the Dutch braid and held with a pair of Lilla Rose You-Pins.  Be sure to sign up for my newsletter as I have a new special coming soon!


Tuesday, May 22, 2012

'Do of the Day #5: Tails Up Twist for Long Hair

The Tails-Up Twist is a super popular hairstyle for women of all ages. Most of us have worn this look with the ubiquitous claw clip making it a practical, but somewhat uncomfortable and unsecure--don't EVEN think of putting your head back on a chair or headrest of a car with a claw holding it up--OUCH!

Add to all that the fact that longer than shoulder length locks gives you more of a floppy rooster tail than a cute little fluff at the top! I've been determined to figure something out so I can wear this style again...wah-lah! Using a Lilla Rose flexi clip to hold it up, I can tuck the longer ends into the twist on either side and they stay put--comfortably--all day! Perfect!


I wanted to make it fancy for a girls' day out with my sister, so I braided a bit of hair above my ear and wrapped it around like a headband.  It is secured with a couple bobby pins just behind the opposite ear.
As a final touch, I swept my long-ish bangs over to the side (again used a couple bobbies) and sprayed it all with flexible hairspray.

Monday, May 21, 2012

'Do of the Day #4: French Twist & Headband

Today's 'do is a first time experiment. I really love the Lilla Rose beaded headbands, however the wonderful adjustable elastic band needs a place to hide when doing an updo like this French Twist!  See what you think:

French Twist with a Flexi and a Freestyle Headband for accent.  (Had to leave in the little guy making a funny face too!)

Thursday, May 17, 2012

'Do of the Day #2: Half-Up Twist

Our 'Do of the Day is a twist on a half-up: The Half-Up Twist!


Take this classic hairstyle up a notch by wearing a Lilla Rose flexi instead of a plastic claw or barrette.   
**Shown above: Small Petite Dragonfly  Shown in video: Medium Celtic Cross**

If your flexi is sized to wear all your hair up in a French twist etc., it's probably too big to pull back only the top section of your hair.  However, twisting it into this style allows you to gain more versatility with that larger clip--brilliant! 


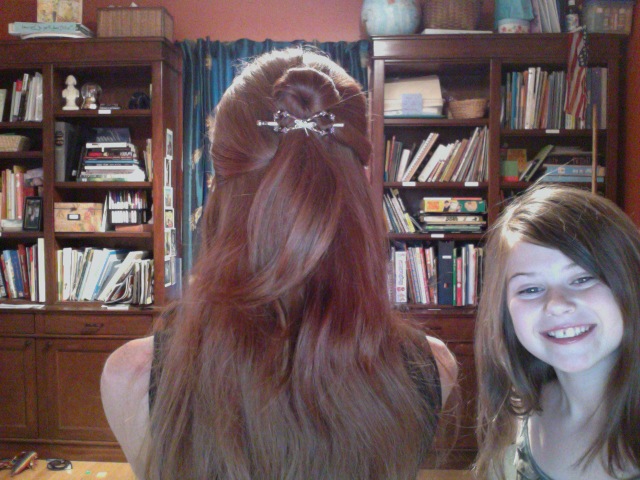
Thumbs up to my lovely assistant, Elena. She has become quite the producer making sure to start and stop recording and shushing her brothers while we are filming.  I'm working on featuring her with some of our 'dos---we'll see!

Wednesday, May 16, 2012

'Do of the Day #1: Twisted Sides Drop Bun

We all need summer projects, right?  Well, join me each day for a new 'Do of the Day!  I'll of course be featuring a lot of my Lilla Rose hair products, but plan to do some with just simple ponytail holders etc.


Today we have a twisted sides drop bun.  It looks tricky, but really goes up easy-peasy using a Lilla Rose flexi. 

Wednesday, April 18, 2012

Lilla Rose Headband Styles

Wow! You all really love the Lilla Rose headbands as much as I do. Since I've started carrying them at my booth for shows and home parties I've realized how popular they are and decided to show you a couple different ways to wear them.

First up is this fun style that my new friend Anjanette was sporting when we met yesterday. Decided to give it a whirl this morning and like it! Very feminine, romantic, vintage-looking do. Anjanette said she found it somewhere on Pinterest...ah, love that Pinterest!

Here's what the captions read (they look tiny here): 1. Start with elastic headband as usual, but on TOP of your hair. 2. Twist & tuck sections up and around the elastic band. With long hair you'll want to fold the sections in half before twisting & tucking. 3. Secure layers with bobbies. If you don't have layers, add some for extra bling!

Second is a classic half-up secured with a flexi clip and the headband for accent. This is one of my go-to styles lately. Love it! For those of you that like "the bump", a flexi + headband is perfect. I'm not too "bumpy" myself, as you can see, but a little is fun.


The great thing about our beautiful beaded headbands is that they have a super-soft, adjustable elastic band that allows you to wear them without the typical discomfort of an all-around band. They won't give you a headache and if they feel a tad tight after a few hours you can just make it a bit looser. Fabulous!

Here's my link if you want to go shop, or local friends can just give me a call as I carry them in stock for $18. Go ahead, make the world a prettier place...wear your Lilla Rose hair jewelry!

Saturday, January 14, 2012

French Twist with Side Braid

Ooooh, aren't you lucky! I'm such a techie blogger that you get to see today's hairstyle via not-quite-in-focus pictures from my phone. Wheee! (Can you imagine how jealous I am of the gals who really know how to do this the right way? Thanks for putting up with me!)

I've seen a lot of messy buns lately with the bangs Frenched on one side, and since I prefer a twist to a bun, I thought I'd give it a shot.


First, part your front on the side and begin to French braid at an angle to the back, but only pick up hair with the bottom strand. (Typically you pick up hair with each crossover...for this you just cross the strand closest to the top of your head without picking up additional hair.) Stop braiding when you get about above your ear or so. Secure with a clear elastic. Loosen the braid by tugging on the strands from the top to the bottom.


Now gather all your hair (including the tail of your braid) into a low pony and begin to twist upwards close along your head. BTW, those waves in my straight hair are left over from yesterday's Twisty Bun.


Take that tail and fold it in half then roll it into the "pocket" you have formed by twisting the pony up.


Using a flexi clip (you have one, right? If not, you need one...go to my Lilla Rose website over there--->in the sidebar) insert the pin along the scalp at the top of the twist and hold the hair like so (see my pointer finger grasping the twist?). You CAN use bobbies to hold this twist, but depending on the texture of your hair, it could take 2 or 20 (for me, about 10 and they will fall out!).


Bend the beaded loop of the flexi over the twist and secure the pin through the other side, locking it in place: click, click, click.


Here we go! Watch this video to see this in action:


Here's the side view:

Aaaand the not-quite-enough-sleep-but-I'm-up-doing-my-hair front view, hmmmmm:


Thanks for checking this out! I hope you can have as much fun as I do playing with some new do's!

Friday, January 13, 2012

Twisty Bun Tutorial

This is one of my very favoritest ways to wear my long hair, but it works for any length long enough to have a 2-3" long tail out of a ponytail. I call this Twisty Bun "The Anne with an 'e' " (for all you kindred spirits out there) because the friend who showed me how to do it was shown by a gal named Anne. I'm sure it has a specific name somewhere? It's a kind of twisty, messy bun and is super fun!


**(10.12 update)  I finally got this put together as a video tutorial.  A picture tutorial follows below the video frame.  Thanks for watching!**


Start with your hair half dry...leave the length partially damp and add some gel. (Those are my daughter's arms...I'm not really a contortionist with tiny hands.) One of the reasons I love this style is because it takes sooo long to completely dry my hair. This way only takes five minutes with the dryer (still ugh!).

Next, gather your hair into a pony and secure it tightly, but not too tight. You need to be able to lift one band of the elastic to secure the twists.

Section your ponytail, starting at the top right. I always think of it as a clock and you are going to alternate making twists both clockwise and counterclockwise around the pony. Twist that section of hair (you may have to fold it in half first if your hair is long like mine) then bring the end up to the elastic.

Lift up one band of the elastic and wrap the twisted section around the outside of it, tucking either the end (shorter hair) or the loop (longer hair) through half way, then let go. The elastic should be holding that twist securely. Repeat on the left side, then continue alternating and sectioning around the pony.


This is with about 6 twists done:


And wah-lah! Your finished Anne twisty bun. You can pull out some of the ends to make it more messy if you like. But wait....


It looks so much prettier with an ornament! I've tried different hair toys, but my Princess Tiara Freestyle flexi clip always wins.


Slide the pin of your flexi through the pony elastic to secure it well and to give the illusion that the clip is holding the bun.


All done and ready to face my day! Now I need a cup of tea...


Oh yes, and the bonus...the twists will curl your hair as they dry so tonight I'll have some awesome waves if I want to take it down and fix it differently.

Thursday, January 12, 2012

More Fun Hair-Dos

Okay, I'm not a "junkie" yet, but Pinterest has piqued my interest in more fun hair styles! I've tried several and posted them on my Lilla Rose facebook page, but thought I would put a few up here.

Today's do, and actually not even from Pinterest! I've done this before but it's holding the best ever today.


It's called the Gibson Tuck. You start with a low topsy-tail, then if you have shorter hair you tuck the tail up into the pocket formed when you flipped the pony. Mine is too long to do that...the tail falls/pokes out through the rolled sides. So I twisty braided the tail and rolled it into a kind of bun and secured it with a flexi clip (you do own one of these now, don't you?). Fabulous. Didn't even need a single bobby pin!

I found this one on The Small Things Blog. It's her Notty or Nice Holiday Hairstyle. I really like it and will wear it again soon...this was just a late-night trial.


And finally, the braided bun from The Beauty Department:


Eric really likes this. I wore it for one of our family Christmas get-togethers and found it to be surprisingly comfy. I counted at least 24 bobby pins to hold up the five braids all day, but it held nice & solid and flat to my head so I could lean back in the car on the drive down. I thought the flexi added some bling but didn't end up leaving it in...maybe a little TOO much in the fancy department LOL.

Saturday, December 17, 2011

Peacock blue, I love you!

As we come up for air after our months of remodeling our kitchen, I find it's good to have a sister who surfs around and finds fun hair things to try!!! Today was the first Saturday in a looong time with no mile-long checklist to complete. Well, of course there is still more to do...but nothing pressing like a plywood window and snow in the forecast or anything. Soon, there will be a whole before/after post...but moving on...

So! Jo posts some totally fab pix of her latest dos along with links to the tutorials on You Tube this morning. Lucky me, we had a party to attend tonight so seemed like the perfect opp to try one out!

Step 1: Curl that hair, girl. You need ringlets from tip to tail. Hot rollers may not be the best mode, but they're quick and what I got!

(please note Pitt State shirt...Woot! Nat'l Champions as of today!!!)

Step 2: Feel like a retro movie star with your drop-dead ringlets. Or feel like a almost hot momma...really should have worn a bra today. Swoop those bad boys over into a low side pony, leaving just a small section out on the far side. Twist and twirl sections of the pony up and pin to make a giant swirly bun. Whaat?!! That doesn't make sense?? Come on... Okay, I posted the link to the very excellently done You Tube video below so you can see it happen step by step.


Step 4: Adorn with some kind of fabulous hair ornament...for me I chose my Grandma's peacock feathers...from her own real peacocks! Who knows how old the feathers are...50 yrs??? Regardless, they are fantastic!


Step 6: Go to a party with your friends and talk about hair, among other things. Because it's what girls do. (Carrie...I cropped most of your, eh, interesting look, out for ya!).


Step 7: Come home and try to take pictures of your very cool hairdo by yourself. Struggle, really, because who can aim, shoot and smile backwards in the mirror?? At least on the first try? Not I said the fly. And note the husband just standing idly by. So helpful. All he said was "I hope your hair was worth it." (Being late to the party, that is). Well, of course, silly!


Here is the link to Lilith Moon's instructional video. So wonderful and she's cute as can be! Thanks hair girl!

Wednesday, July 20, 2011

The Marigold Meadow

I think when you're over 35 that staying up until 2 a.m. counts as an all-nighter. What an adventure! Kathy was here serving as my hair slave from 8 til about 1:15 and we thoroughly enjoyed viewing Persuasion in the midst of our chaotic experiments! Well, except perhaps for the world's longest prelude to a kiss in cinematic history...just kiss the woman Rupert!

Ah, yes, where was I? Hair. Okay, this picture is the final result, still auburn (bummer) but certainly lighter than where I began, so it's all good.

We started by bleaching all my hair with the soap cap...twice. The first time there was little change so on advice of my hair guru friend, we went for a repeat. Second time...wooo-weee...Kathy kept saying "that's really strawberry blond" in kind of a worried voice as I rinsed it out.

Here's how it all went down. My un-hennaed roots lightened with the bleach really well. The rest of my head probably lifted 3 levels or so...some strands lighter than others (that's my unprofessional opinion). The cassia-henna-buxus mix...


left a lovely marigold color on all the light roots...not enough henna in it to add the strawberry shade I desired. The rest of my hair got a nice gloss and condition from that mix, but it didn't alter the color.

Not wanting to have glaringly blond roots, I opted to go ahead and mix up another concoction, stronger on the henna this time, and applied to just the really yellow spots at my roots. I wrapped it all up with plastic, put a wool stocking hat on and went to bed (2 a.m.)! At 4:45 a.m. I woke up screaming (seriously, must have been some dream) and decided I ought to go shower it out. I showered in complete darkness, wrapped my wet head in a towel and went back to bed until 7:30 this morning. After a good blow dry this is what I've got. (I look kind of angry in the photo, really I'm not!)


If I want to wear pigtails, I might be in trouble, but otherwise I don't think it's going to be terribly noticeable---until it starts to grow out!


I think I'll tweak my recipe and start doing my roots with a cassia-henna mix to smooth out the transition. In the meantime...well, it was worth a shot, it did make some difference, and it was a fun girls' night. Life really is like a box of chocolates, isn't it Forrest?