Showing posts with label cakes. Show all posts

Tuesday, April 20, 2010

Cakes 101 - The Good Stuff (Cake Recipes)

So for me, the good stuff is the cake itself...I can live w/o frosting! I have several tried and true recipes to share...the best part? They all start with a cake mix! (Duncan Hines to be specific).

I tried a couple "scratch" recipes when I was starting to mess around with flavors etc...and really, they were just dry and crumby. When I finally ran across my favorite cake cookbook, The Cake Mix Doctor by Anne Byrn , I became hooked on embellished cake mixes! She explains how the emulsifiers and other goodies (okay, not so "good" from a health perspective...but that's a whole other can of worms) in cake mixes have conditioned the vast majority of down-home Americans to prefer the taste and texture of cakes from a mix over from scratch. Now, I don't ALWAYS agree with that...my mother-in-love, Cheri, makes the BEST chocolate sheet cake on the face of the earth...but for the most part, I think that statement is right on the money!


This basic white cake recipe can actually be used with about any flavor or mix with stellar results. I used this as my standby "white wedding" cake...and it never fails to get raves!

White Almond Sour Cream Cake (WASC)

1 box white cake mix (Duncan Hines)
1 c sugar
1 c all-purpose flour
3/4 t salt
8 oz (1 c) sour cream
4 egg whites
1 1/3 c water
3 T oil
1 t pure almond extract
1 t pure vanilla

Stir all dry ingredients w/whisk until well blended. Add remaining ingredients and beat on low speed 2-3 minutes. Stop the machine after 1 minute and scrape the sides and bottom of your bowl really well. Bake at 325 for a bit longer than what's listed on the back of the mix box. The batter is thick and the cake is dense, so you can fill your pans 2/3 full...it shouldn't overflow.

Chocolate version: Use chocolate mix, omit the almond (or keep it if you like choc/almond YUM), and sub 3 whole eggs for the whites.

Lemon version: Use white mix (DO NOT USE LEMON!!), sub lemon juice for 1 c water, use 3 whole eggs and stir in 1 T lemon zest & 1 t lemon extract instead of almond. (THIS IS AWESOME!)

Okay kids, after perusing all my other recipes, guess what? They are all from The Cake Mix Doctor!! I don't feel right (probably since it would be illegal?) posting them so here's the deal...

1. Purchase the book HERE OR
2. See if there is a recipe you want to try on her website HERE
3. Check it out from your library OR
4. Borrow it from me!

I CAN tell you what my favorites are out of the cookbook:
  • Almond Cream Cheese Pound Cake (this was, hands down, The Sweet Ladybug's most requested cake flavor) p. 129

  • Deeply Chocolate Almond Cake (so yummers, but very fragile crumb...after awhile I just made the WASC w/chocolate and left the almond extract in to have a cake that would stay together better) p. 26

  • Triple-Decker Strawberry Cake (perfectly pink!) p. 67

Oh yeah! I DID make some chocolate cupcakes from scratch for Easter that turned out fantabulous! I have some not-so-fun new food allergies and now anything based with a cake mix is off limits (booooo!), so maybe I can update this with some successful scratch endeavors. What worked for Easter was Hershey's Perfectly Chocolate Cake (click HERE).

There you have it! Happy Baking!

Saturday, April 03, 2010

Cakes 101 - The Icing on the Cake

Mmmm...I'm gonna start with frosting recipes since it seems like that's the favorite part for so many people (not including moi)!

My husband, Eric, LLLOOOVVVEEESSS frosting...so he helped me tweak recipes until we found just the right ingredients for my Classic Buttercream. Actually, I don't consider it really a buttercream because it has shortening in it as well...but that shortening helps the frosting hold it's shape and smooth easily which is usually what you want when decorating a cake. Plus, kids and kids-at-heart love the super-sugary sweetness. It's also the recipe you want if the cake is going to be outside when it's hot...it won't melt under most circumstances and will allow you to leave your cake at room temp for a couple days, no problem.

If you are just wanting a pretty "dinner" cake with a layer of icing, I recommend skipping the powdered sugar/shortening route and going for something more delicate...like the Whipped Buttercream or Ganche.

Okay, so on with the recipes.

Classic Buttercream

1c. shortening
3 stix butter (salted, sweet cream--if you have unsalted add a 1/2 t. of salt), softened
1 t. vanilla extract (clear, if you have it)
1/2 t. pure almond extract
1/2 t. clear butter flavoring (found in the Wilton isle)
2 lbs. powdered sugar, sifted (about 8 cups)
2-3 T. light corn syrup

Cream the butter, shortening and extracts until smooth with an electric mixer . Add the powdered sugar about 1-2 cups at a time, blending well after each addition until all added. Mixing on med-hi speed, add the corn syrup, then turn the mixer off. If you mix too long you will end up with little air bubbles in the frosting that will drive you bonkers trying to smooth the cake!

Notes: A stand mixer with the paddle attachment works best...I've burnt up the motors of two hand mixers making variations of buttercream, but it can be done in a pinch...just turn it off it gets hot!

Ingredient-wise: Crisco is what you want for the shortening...other brands can add a weird flavor and/or texture. C&H is best for your powered sugar; I've also used a different brand sold occasionally at Sam's (Chef's Choice? in 7# bags) with good success. Generic brands are often made with beet sugar vs. cane and taste something nasty.

The corn syrup will add a nice bit of elasticity to the texture of the frosting, allowing you to smooth it on nicely. You can also just add some water or milk to make it a little smoother if you don't have any on hand. That is also what you want to do if you need to adjust the consistency for decorating. Anyone who has taken the Wilton method classes knows about the importance of consistency when using different techniques!

Whipped Buttercream Frosting
from Southern Living December 2000

1 c. milk
1/3 c. all-purpose flour
1 c. butter (salted), softened
1 c. sugar (super-fine)
1 t. vanilla

-Whisk milk and flour in small saucepan until smooth. Cook over medium heat, whisking constantly, until very thick. Remove from heat and chill slightly.
-Beat butter, sugar and vanilla at hi speed until creamy. Add cooled milk mixture, beat until blended. ~3 cups~

Notes: This recipe is a little more tricky. The milk/flour mixture seems to always form a bit of a film on top when chilled that has to be removed. If there are ANY lumps in the mixture left over, they WILL be in your frosting. My solution was to strain the milk/flour through cheesecloth after chilling. Messy, but worth it for the smooth, fluffy results. Yummers.

"Perfectly Chocolate" Chocolate Frosting
from the back of the Hershey's Cocoa can

1 cup (2 sticks) butter or margarine
1 1/3 cup HERSHEY'S Cocoa, sifted
6 cups powdered sugar
1/3 cup milk
1 teaspoon vanilla extract

Melt butter. Stir in cocoa. Alternately add powdered sugar and milk, beating to spreading consistency. Add small amount additional milk, if needed. Stir in vanilla. About 4 cups frosting.

Notes: The title says it all...nice, dark color and delectable! I doubled it for ya, as 2 cups just ain't enough! Oh, and don't forget to sift the cocoa and powered sugar...you'll regret it if you skip that step. Believe me.

Chocolate Ganache

3/4 c. heavy whipping cream
8 oz. semisweet chocolate, finely chopped OR 8 oz. semisweet chocolate chips
1 T. liqueur of your choice (optional)

Place chocolate in a large mixing bowl, set aside. Bring the cream to a boil in a small saucepan over medium heat, stirring constantly. Pour the hot cream over the chocolate and gently stir until melted. Stir in the liqueur if using (I've never put any in).
Let stand a room temp for 10 minutes if you want to glaze a cooled cake, otherwise chill until thickened to frosting consistency. You can also whip the cooled ganache, to make a light whipped frosting...it can be tricky, but it's super yummy! ~2 cups~

Notes: Ganache is a little slice of chocolate heaven. IF you over mix it when trying to whip it, it goes straight to hell. It will turn into grainy soup. The only way to rescue it from that state is to reheat it and start over with the cooling process. You may want to double this recipe to make enough for a thick layer on or in your cake (as a filling) and for extra taste-testing!

Well, that should give you a mini-arsenal of frosting recipes to ice most cakes. Now the trick is getting it from the bowl to the cake...and that's enough for a whole other post. So until next time...happy licking the bowl!

Wednesday, March 24, 2010

Cakes 101 ~ Baking Basics Etc.

So here it is, the first installment of my caking tutorials! Let's dive in...before you know it you'll have your gang saying "mmmmm....now THAT's good cake!"

1. What's your pan, man?

I recommend basic, shiny aluminum pans for all your cakes except cupcakes. The dark, non-stick pans actually get hotter in the oven (elementary science there...darker colors absorb more heat), therefore cooking the edges even faster. For cupcakes my fav is the Pampered Chef stoneware pan. Perfect every time!

2. Pan Prep

No matter what pan you decide to try out, be sure to prep it correctly. Go for an all-in-one baking spray...I like Pam for Baking best. Baker's Joy (gets clogged easily and stinks for some reason?), and Wilton's Cake Release (not a spray I believe) are other options. In a pinch you can use the old fashioned method and paper towel on some shortening and then dust with flour. Lining the bottom with parchment paper is another good option, but takes an additional step so I just skip it.

Extra bonus tips:

  • Purchase a flower nail (sold with the Wilton stuff at Wal-Barf, Michael's etc.) for a dollar or so, flip it upside down and stick it in the middle of your cake pan before pouring in the batter. The nail will act like a tiny heat conductor and help the middle of your cake (ya know, the part that likes to still test "gooey" while you cringe watching the edges almost burn) get done at the same time as the rest of the cake.

  • Use baking strips! Wilton's are called "bake even strips", but you can make your own by cutting up old terry-cloth towels . Basically you need a long strip of absorbent toweling cut the same height as the outside of your pan. Soak it in cold water, wring out and wrap around your pan, fastening tight with a safety pin (I've never made my own, but make SURE you watch your cakes carefully so the towels don't catch on fire!). Using baking strips will keep the outside edge of your pan cooler, therefore making the edges bake a little slower than usual (evening out to the time of the middle...hopefully). Once I figured out how prep my pans correctly, it made baking day a breeze in comparison to the many times I would whisper prayers that all the cake would come out of the pan. There's just nothing to shoot up the blood pressure like seeing 1/4 of a cake stuck to the bottom. Ugh!

  • Turn down the heat! Bake your cakes at 325 degrees rather than the old standby of 350. It may take a few minutes longer, but they'll come out more even. Now, this isn't the case for ALL cakes...stick to 350 for really dense pound cakes and cupcakes. Actually, if you want a nice dome on your cupcakes, preheat your oven to 425 then turn it down to 350 right when you pop them in. They'll be nice little mountains for ya. If the batter is chilled before they'll be even better! Of course, I kind of like flat cupcakes for decorating...but anyhow. Once your cake is done (no gooeys sicking to the toothpick tester, and edges just barely starting to pull away from the sides), pop that pan out of the oven onto a cooling rack. NOT the counter directly or the stove...you need some air moving under the hot pan. Right away grab a clean dishtowel, folded in half and gently, gently PRESS any unevenness out of the cake. Yup, push on the top of your cake...make it flat. Just trust me.Let it COOL for 10 minutes. Set your timer so you don't forget! Then run a knife around the edges to make sure it's loose there. Grab a cooling rack, set it on top of the pan and FLIP it out onto the rack. Now put your other rack on top of the "bottom" of the cake an FLOP it back over to finish cooling.

All righty then...that's a wrap for this morning! I'm vacationing on the West coast right now and have some more sights to see! I'll be back soon with some recipes....mmmmmm! Let me know if you have any requests!

Monday, March 08, 2010

Cakes 101 - A New Series

As I contribute plenty of nonsensical info to the ever-expanding blogosphere, I thought I would start a little series on something actually useful. For the last several years I've had a cake business that quickly grew from "little hobby" to "a too much too handle business". Last February I took my last order and the rest is history. My website is still up over at The Sweet Ladybug if you want to see some of my past creations, or there are quite a few in former posts if you click the "cakes" label on the right. For now, all my licensing is expired and I'm retired...so don't start emailing me your orders (ha)!

Cakes 101 is going to be a series of posts with tips, techniques and recipes...keeping it simple for all you gals (or guys) out there who want to make yummy tasting and nice looking cakes for your family and friends! Everything I'm going to share is probably available somewhere else out in cyberspace, but you'll get the advantage of my trials and errors...I'm going to siphon it down to the best of the basics.

Follow me and you're sure to have some smiles like the one on this little guy!

Kai at his 5th birthday party last month.

Monday, June 15, 2009

And...that's a wrap!


Yes, this is it folks, my last wedding cake! I am officially retiring from the cake business (for now...). This huge monster was for a wedding this past weekend at a beautiful winery in Lee's Summit. Looked like the perfect place, perfect weather (it was outdoors), perfect dress...and, so, of course, the perfect cake to go with it all (smile).

Saturday, December 06, 2008

Holiday Cakes!

Some Thanksgiving turkey anyone?

LinkI had been wanting to make this cake for a couple of years...it was one of the first cool things I saw on the cake site I like to frequent, CakeCentral. The directions were great and it turned out even better than I imagined! How fun is that? I don't know if I'll ever roast a real Tom again, might just stick to this version.


These gift package cakes were for a corporate holiday party down on the Plaza. A friend of mine from High School, Erin, planned the catering and thought of me. I was so pleased with how they turned out...and how great to get back in touch with an old friend!


This shot is just without the flash, you can't see the shimmer on the gumpaste bows quite as well, but I like it better. Oh, these are the yummy flavors...chocolate with whipped chocolate ganache filling & chocolate fudge frosting; classic white with lemon filling & buttercream; almond cream cheese with buttercream. Delish!

Wednesday, October 29, 2008

Fun Cake Month

October has been a fun cake month for me. Weddings are done for the year and I'm back to birthdays and other special occasions! Here are most of them from the last 4 weeks:

Actually delivered this one this morning for a retirement party. I really liked doing a fun theme for an adult! And the cotton "smoke" is my favorite part, though Eric thought I shouldn't put it on since it isn't edible. Okay, so next time I'll find some white cotton candy!


This was a simple boy baby shower...I've done one before with the onesie made of fondant. Around the cake I wrote: Snips and snails and puppy dog tails, THAT'S what little boys are made of!


Ooh-la-la! If you haven't seen the Fancy Nancy books for little girls you should check them out! So cute! This cake had sparkles, swags, swirls, flowers and even glitter on the mini cupcakes. Each little girl at the party was getting a cupcake on her tea saucer while the moms got the big cake...I thought that was funny (smart mommies)!


Love this type of theme for any age girly birthday! My favorite colors and the flavors on this one were chosen after the customer had some of her neice's wedding cake I made: coconut cake with whipped chocolate ganache filling and buttercream icing. Yummy!


And here's Barbi in all her swirly splendor! Actually doll cakes are a pain in the you-know-what, but the little gals just love them and they are sure fun to look at!


Hope your mouth is watering now...I've always got cake in the freezer if you happen to stop by!

Wednesday, October 08, 2008

I Did What?!

It's a beautiful day in Kansas City...and just perfect for the garage sale I'm having. Besides that, it's given me time to just sit and work on the laptop...I have actually updated the galleries on my cake website for the first time in four months!! (Jo, I know you're so proud of me). So, if you want to see what I've been doing the last half of the summer or so in cakeland, cruise on over to The Sweet Ladybug. Meanwhile, I'm going to go check on my "resting" kiddos and then perhaps add another post on here before closing up shop!

Have a lovely afternoon!

Friday, February 22, 2008

Pretty In Pink2


Last weekend was fun! After I stayed up til 2 a.m. finishing my preparations, my friend Molly joined me at my booth out at the Love In Bloom bridal fair at Powell Gardens. We spent the day enjoying each other's company, meeting lots of brides-to-be and their friends, and chatting with other cake gals. Here we are posing...that's Molly on the left and me on the right.


To add a little excitement, visitors voted for their favorite display cake from all the different cake vendors. It was my first bridal fair and I took home 2nd place! Whoo-hoo! I received a beautiful centerpiece flower arrangement with purple and pink primroses and all kinds of other pretties along with a cash prize.

My cake was titled "Rosa Silhouette" and was a three tier square cake that I stair stacked to give a flat surface on the back. Then I piped a silhouette of a bride and groom along this "canvas" turning what usually would be the back into the front of the cake. I added lots of pink pearly bobbles around as borders and on wires for the topper. It was much fun to create and my favorite part is that the design is my very own brain-child! So many of my other cakes are inspired directly from another design--unique creations always take the cake in my book!


I wish I had taken pictures of the other cake booths, but I became quickly distracted after the fair got going and never got my camera out again! Now I'm just hoping for a wedding contract or two...what a beautiful place to have a wedding.

Friday, February 15, 2008

Pretty in Pink

Nothing to do this Saturday? Come out and see me at the Powell Gardens "Pretty In Pink" Wedding Fair--you can taste some yummy cake! The gardens are 20 miles East of Lee's Summit on Highway 50. Click here for more info!

Sunday, January 20, 2008

Cakes of Late

It's been a crazy busy couple of months for The Sweet Ladybug...that's my cake gig. Yesterday I wrapped up my last two "big" cakes before our much needed vacation. This one is the teddy bear baby shower cake and I don't have the pix loaded from Tisha's party cake yet.


The teddy is sculpted out of fondant...really fun to do and a lot like working with polymer clay. I haven't done something like that in years...I think it was 8!!? years ago when my friend Michelle had a girls night of clay ornament making or something. Wow. Anyway, I digress. He was a super blobby looking bear until I lopped off about a third of his hiney.

The bow is made from a mixture of fondant and gumpaste. Gumpaste dries a lot faster than fondant and I think made it easier to work with. I rolled it so thin that it felt like a piece of fabric. The gumpaste must also keep it from stretching as it held shape really well. I followed an online tutorial over at CakeCentral (where all great cake things live) and it worked like a charm.

My favorite cake of late has to be the "Bo Hunts Game" hunk of camo that I made for part of my brother's Christmas gift. He liked it. The buttercream colors were nasty looking on their own, but together they just disappeared. Ha. (My attempt at hunter humor.) Along the edges it said "Run Game Run. Fly Game Fly. Swim Fish Swim. Hide Game Hide."


I also got to take another shot at castle building last month. This time the whole thing was gleaming as I sprayed it with an awesome little thing called "luster dust". Bring on the bling!


I still want to try a more realistic looking castle someday...ahem, no pink & purple....all fondant covered with cobblestones and flowering vines climbing the towers. Maybe that's what I'll make for myself. I doubt it....we're pretty caked out at our house. Chips and salsa anyone?

Tuesday, December 11, 2007

Christmas Wedding Cake

What a fun time of year to be tying the knot! These are Jessica & Travis' cakes I made last week...yummy...or at least they smelled yummy. Two layers of chocolate cake and one of classic white. The sheet cake was one of my favorite flavors, Almond Cream Cheese. All buttercream icing, satin ribbons and gumpaste holly & bow topper. The gumpaste items I can't take the credit for...the bride ordered them from a talented sugar artist that specializes in gumpaste decorations even before contacting me for the cake! Even with the yucky weather, it sounds like it was a great reception for the bride and groom. Cheers.


Monday, September 17, 2007

Mission Complete

Casey's wedding cake turned out just fab. I was very pleased with the end result and must give props to the mother-of-the-bride, Nancy, who was also the florist---the fresh flowers really made the cake all that!


The groom's cake was funny (it's a traffic ticket...evidently he's had a few)...and a booger to pipe tiny wording...I'm not into putting things on cake like those "edible" images that you can print from a computer...but it sure would have been easier than this!
I sure wish I could be a fly on the wall at the wedding receptions I do...just curious about peoples' reactions to what I consider my artwork...that, and of course I'd like to have a piece of cake!

Saturday, June 16, 2007

Nervous? Me?

Actually, and thankfully, not! God surely answered my prayers for a calm heart today as I set up my first official wedding cake! I've made wedding cakes before, just not for real weddings...class, "dummy cakes", anniversaries etc. So that makes this one a milestone in my cake life :) !

It's called a "Calla Lily Illusion" cake and the stems are supposed to look like they are coming up through the middle of the cake...I would do a couple things differently next time, but I won't give y'all details (the artist's eye is ALWAYS more critical...so I'm leaving well enough alone).

When I used the flash (see dorky picture I took of my cheesy self) the black flowers appeared purple-ish, and with no flash it's blurry, but oh well!


Thursday, March 29, 2007

Cake Class Finale

This month I took the Wilton Course III cake decorating class at Michael's. It was one night a week for four weeks and we learned how to make some new flowers and several techniques using fondant. I have previously done a lot of the things that were taught, but loved learning new tricks and tips as well as how to make the fondant roses! (Fondant is like edible play-doh...great to work with, but I recommend making your own or trying any brand EXCEPT Wilton's--it tastes horrible!)

Last night we had a our final class where we each constructed and decorated a tiered cake. It was fun to see everyone's creations! Some of the gals are really new to decorating and did an amazing job. Our instructor, Linda, was a lot of help...but she didn't want her photo taken. Here we are after 2 hours of work (not including the hours spent baking, filling and frosting at home):


On a side note, though our Michael's is 15 miles from home, three of us live just blocks from each other in the same subdivision...how strange is that? Plus, we didn't know each other before the classes!


My cake is on the left. After hours of making fondant roses, I'm hoping it will be like riding a bike and I'll never forget! I went from starting out at 30 minutes to 15 minutes per rose after making 20 of them. Shew-whee! I'm giving the top part of this cake (chocolate) to my friend Angie as a thank-you and the bottom cake (cinnamon w/apple filling) will be our dessert for LifeGroup on Friday night.

I think I'm done doing classes for a while. I have some fab books from pros in the sugar art world that I'm going to study and learn from on my own. This is certainly a hobby that encompasses a wide range of study: baking, construction, design, sculpture, painting, floral design--the list goes on and I love it!

Friday, November 10, 2006

How to Make a Shark Cake

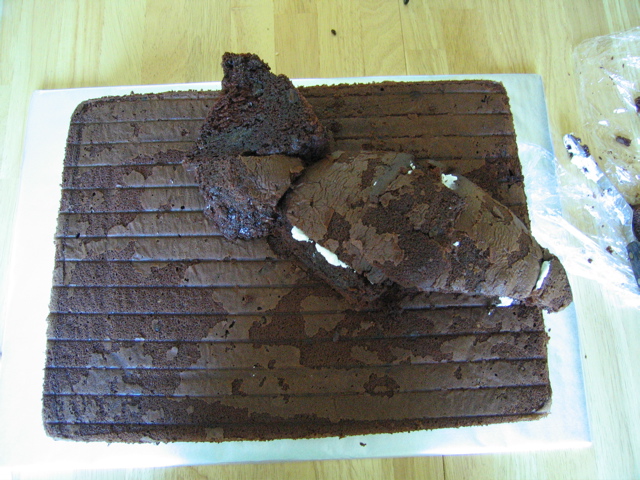
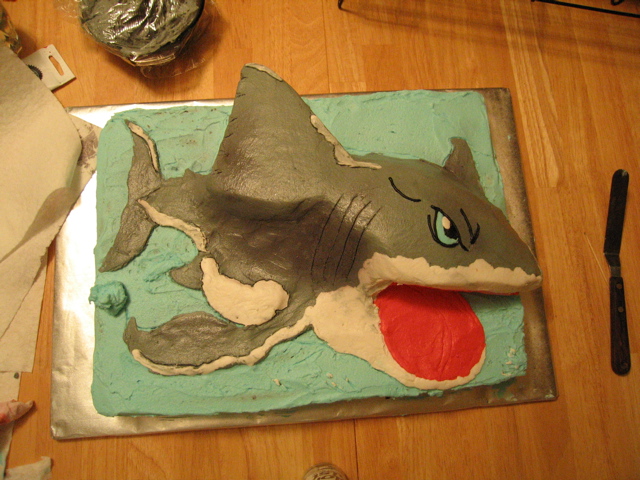
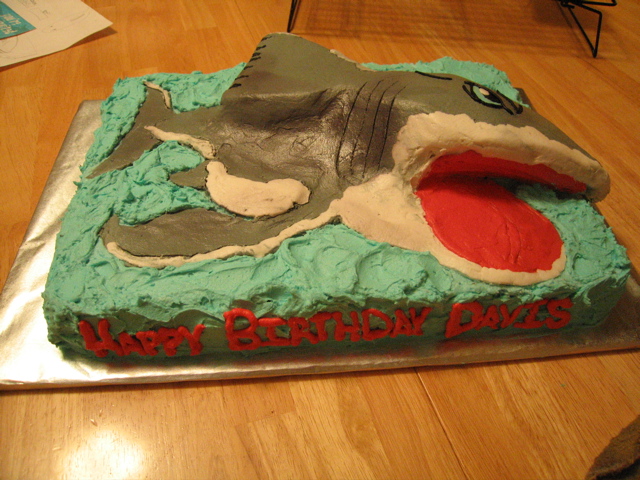
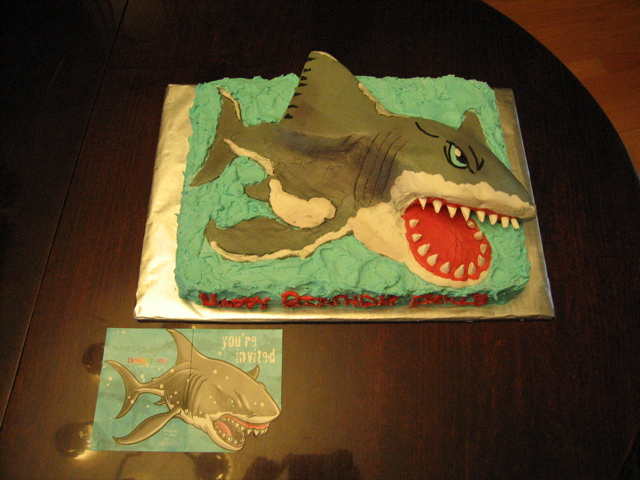
Here are step by step photos and instructions on how to make a partial-3D shark cake. Perfectly mean and scary for a boy's birthday party! Chomp, Chomp! I made this cake for a 5-year old's birthday. To this point, it is the most detailed carved cake I have done...and was soooo much fun! If you have more questions or comments, please leave them at the bottom. Thanks, Resa

1. Bake a 11x15 sheet cake (takes 2 regular cake mixes) or 2 9x13 cakes placed side by side and 1 Pampered Chef Small Batter Bowl cake (can use a small mix like a "Jiffy" brand, or just use some of the sheet cake batter.) This is the kind of bowl you need:


2. Carve the 'bowl cake' into a fin and head...mainly two pieces for the fin and one for the body/head, but a few smaller pieces will be needed for fillers and the point of the nose. I just eyeballed it and find it hard to describe the process since it just evolved as I went (this is the artistry of cake carving!). Place on the sheet cake using buttercream as glue. If any support is needed (i.e. to hold the nose to the body, use a dry piece of spaghetti).


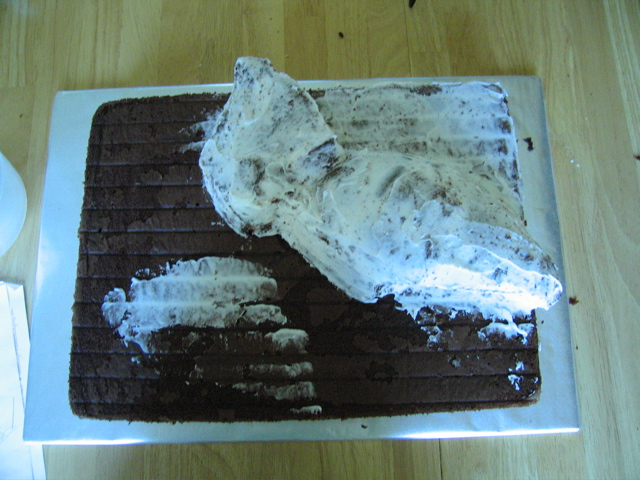
3. Crumb coat the cake with very thin icing to give a smooth work surface.


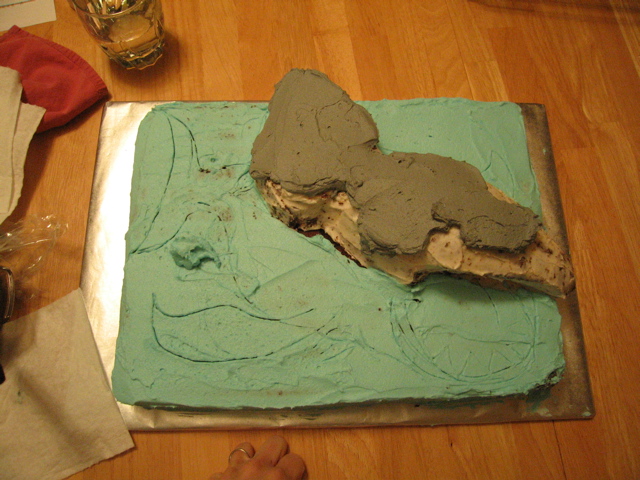
4. Start frosting the areas in the colors desired. Use a toothpick to sketch the remaining shark outline in the frosting.


3. Continue to frost cake, building up icing as needed to contour the body.


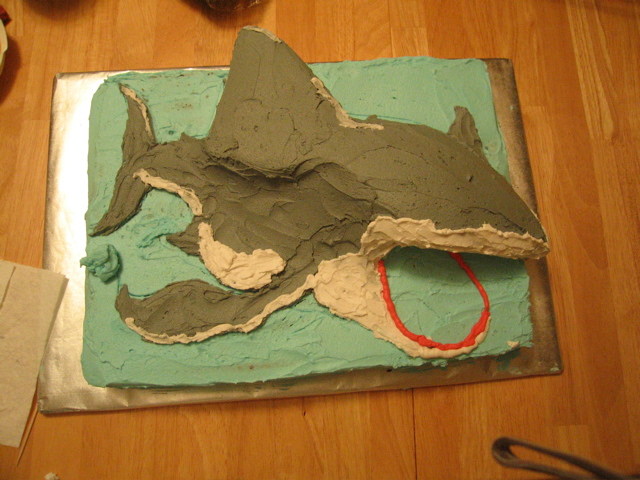
3. Wait for buttercream to 'crust' (make sure your icing has some shortening content for this to happen). Then smooth all areas using a viva papertowl and a spatula. Use a decorating bag to add details like the eye and shading along the fins. Toothpick in the gills, then spray with black decorating spray to add shading (make sure to cover the rest of the cake w/paper towels while you spray).


4. Fluff up the ocean frosting with a spatula or spoon, add message on the side.


5. The best part: Add the TEETH! Cut pieces of white rectangular gum to be pointed and insert into your shark's mouth. Whah-la! There you have it. This photo shows the invitation I used to design this cake.

Sunday, February 19, 2006

Cakes of Late

Here are some of my decorated cakes...some recent, some just favs. This hobby is my creative outlet that would be perfect, except that there are always a lot of dishes to clean afterwards!


Kai's 1st BD


Elena's 1st BD


Elena's 2nd BD


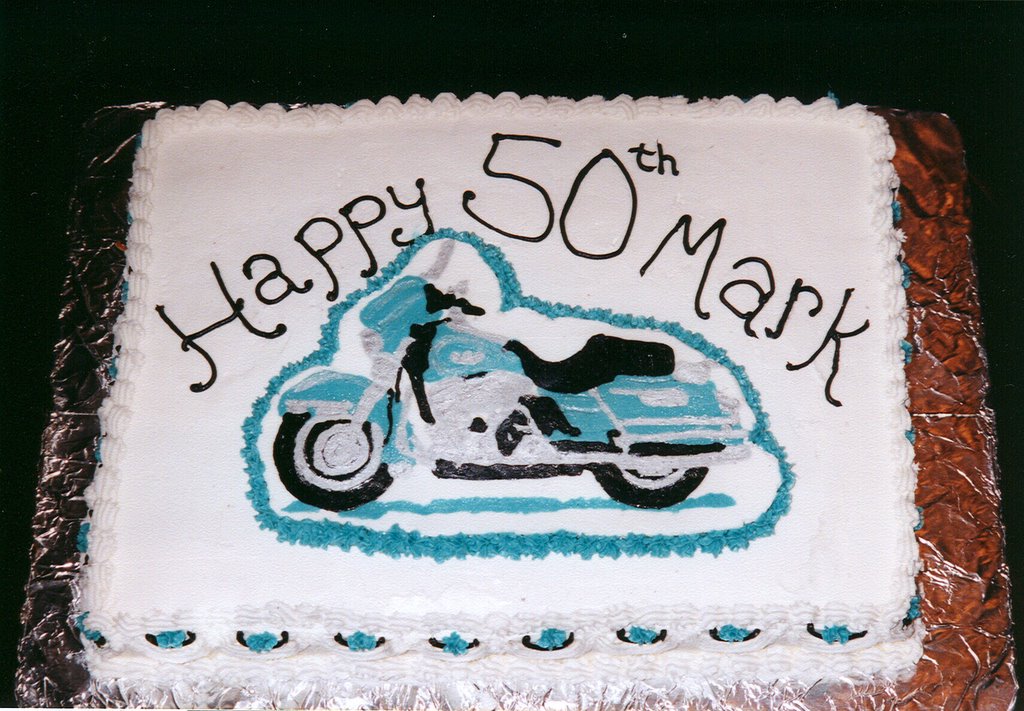
This cake had a tragic ending...well, mid-life crisis...we loaded it in the truck to take to the party and when the door shut, the box collapsed on top, completely mashing the front of the much-labored-over Harley! After a hurried patch job, it was never the same, but they say it tasted good. Oh, dear!


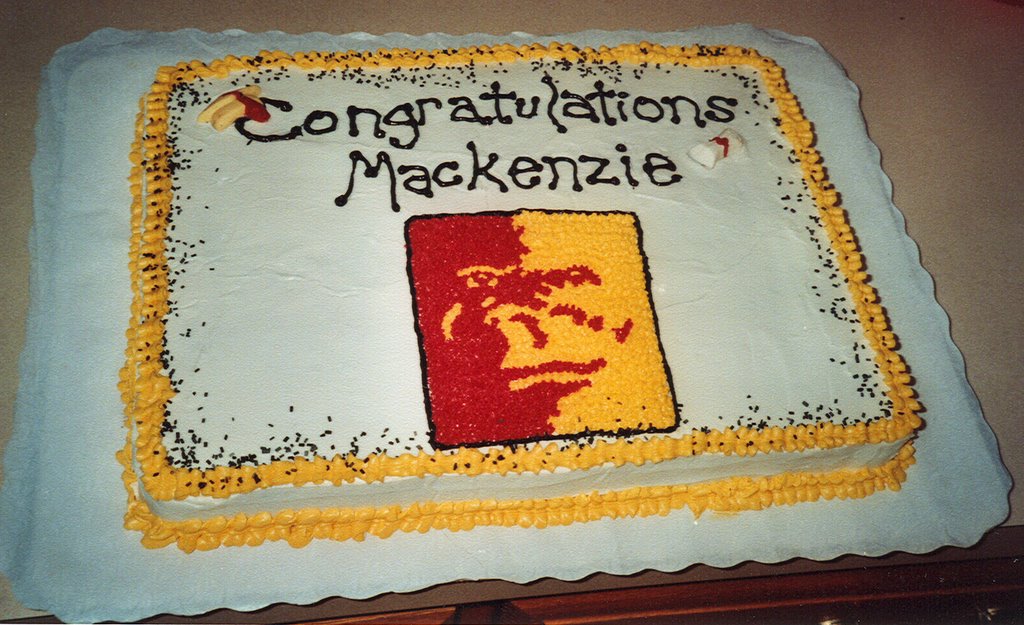
Go Pitt State! The split face gorilla logo cakes are some of my favs to make.


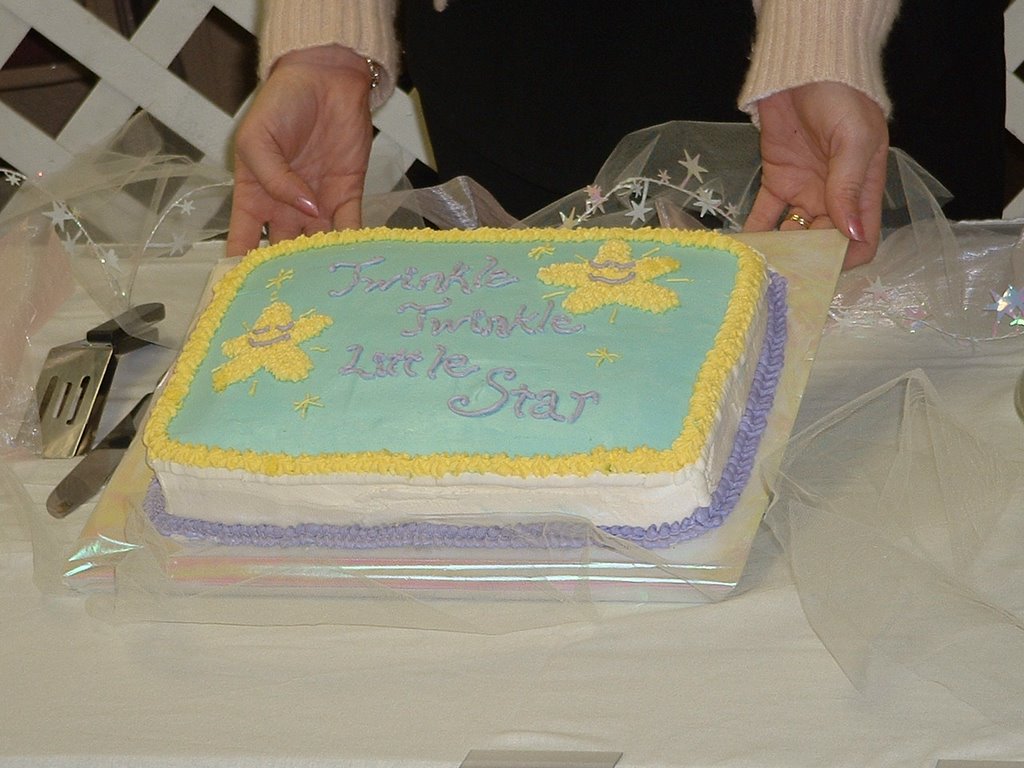
Twinkle, Twinkle Little Star....Naomi!!


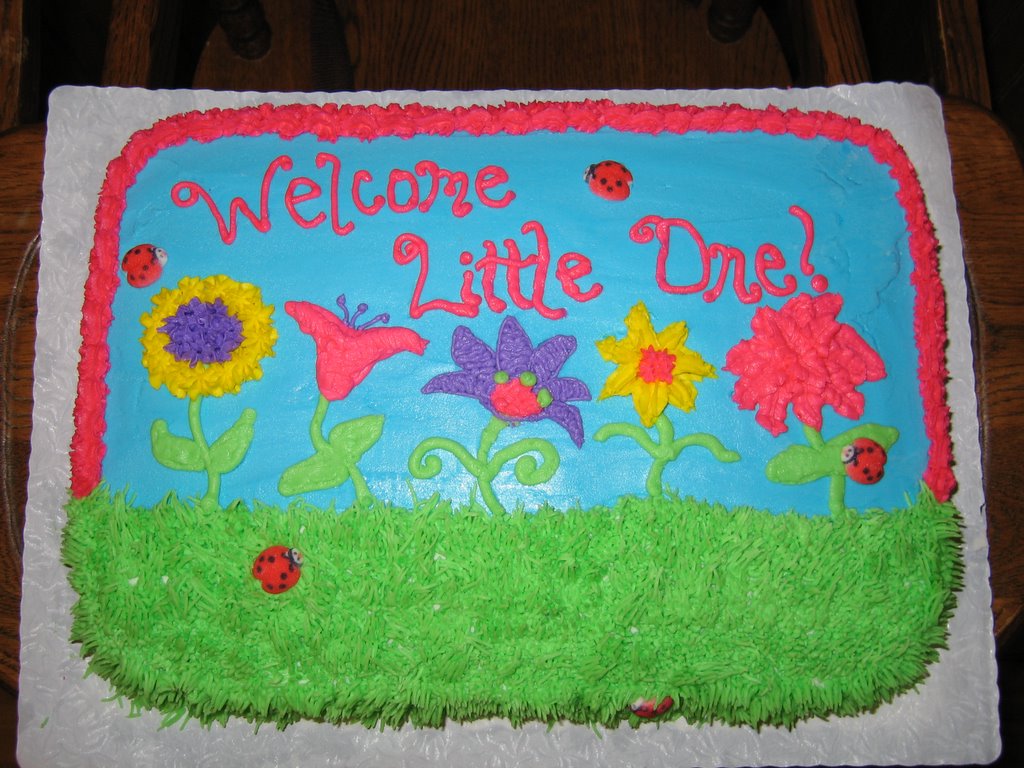
This cutie was too much fun! Loved the grass and sugar ladybugs!